Understanding Interlining and Garment Structure
By The Velocity Wear Team
Need this made?Get pricing for this product— free, no obligation, 50 pieces minimum.
Interlining is a hidden layer built into parts of a garment that need to hold a shape, most obviously collars, cuffs, plackets and the front panel of a structured cap. It is either fused on with heat-activated adhesive or stitched in as a free-floating layer. When a collar goes soft, curls at the points or develops a bubbled surface after washing, it is nearly always the interlining that failed rather than the outer fabric.
Where Structure Lives in a Garment
Most of a garment is meant to drape. A few small areas are meant to stand up to handling and keep a defined edge, and those areas need help that the outer cloth cannot provide on its own. A polo collar has to fold and stay folded. A shirt placket has to stay flat while buttons pull at it. A cap front has to keep its shape against a head. All of them get some form of interlining or backing.
Because it is invisible, it is an easy place to economise. Two polos can look identical on a rail and behave completely differently by the tenth wash.
Fusible Versus Sewn-In
Fusible interlining has a coating of adhesive dots on one side and is bonded to the outer fabric under heat and pressure. It is faster, cheaper and dominant in volume manufacture. Done well it is entirely reliable. Done badly, with the wrong temperature, wrong pressure or wrong dwell time, the bond is uneven, and that is where problems start.
Sewn-in interlining is a separate layer held only by the seams, so the outer fabric and the interlining are free to move slightly against one another. It is more expensive in labour and it is what you find in tailored garments. Its advantage is that it cannot delaminate, because there was never any glue to fail.
Why Collars Bubble
Bubbling, sometimes called delamination, is that rippled, blistered look on a collar or cuff after a few washes. What has happened is that the adhesive bond has released in patches. The outer fabric and the interlining then shrink at different rates and separate, and the surface puckers where they have come apart.
It is effectively irreversible. Ironing flattens it briefly and it returns. The causes are upstream: a poor fusing process, an interlining that was not compatible with the shell fabric, or washing at temperatures the adhesive was never specified for. That last one is partly within your control, and it is another argument for putting sensible care advice in front of staff on a uniform rollout.
“"Structure is the part of a garment you only notice once it has gone, and when a collar collapses the fabric usually gets blamed for something the adhesive did."”
Caps Are the Clearest Example
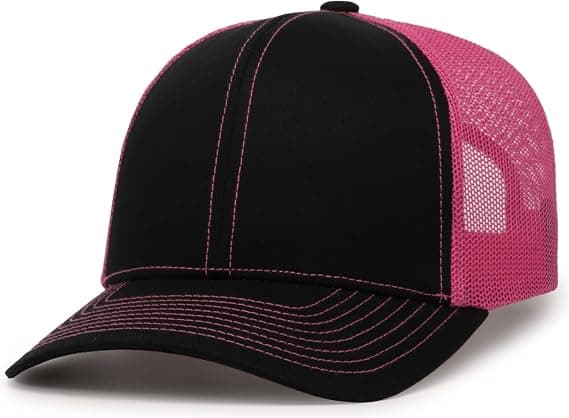
A structured cap has stiffening built into the front panels, traditionally buckram, and that stiffening is the entire reason the cap stands up rather than collapsing against the forehead. An unstructured cap has none, which is why it sits soft and slouchy.
This has a direct consequence for embroidery. A structured front gives the needle something firm to work into, so a stitched logo sits crisp and stays crisp. An unstructured front flexes under the needle and the design distorts more easily, so it needs simplifying and generally suits smaller, bolder marks. If your artwork has fine detail or small text, the cap's structure is part of whether it will work, not an afterthought.
What to Check on a Sample
Interlining is hidden, but its behaviour is not.
- Fold a polo collar down and let go. It should return to a defined fold rather than staying wherever you left it.
- Hold a collar up to a light and look across the surface at a shallow angle; early unevenness in the fusing shows as faint ripples before washing ever begins.
- Feel the collar points specifically, since points are where interlining is most likely to be trimmed short to save material and where curling starts.
- Squeeze a cap front. A structured cap resists; a soft one collapses, and that changes what embroidery will look like on it.
- Wash the sample at the temperature your staff will realistically use, not the one on the label, then look again.
Specifying Structure Without Overthinking It
You will rarely be given a choice of interlining type on a stock blank, and that is fine. The useful move is not to specify the component but to select the garment by testing its finished behaviour. Order a sample, handle the collar, wash it, and look again.
It is also worth matching structure to use. Front-of-house hospitality polos that get washed constantly need a collar that survives frequent laundering. A soft, unstructured cap for a merchandise drop is a style decision and the lack of structure is the point, so long as your embroidery is designed for it.
Getting It Right on a Custom Order
Embroidery is the method most affected by structure, and it is also the method most used on the garments that have structure in the first place, namely polos, caps and workwear. Fine detail and very small text need simplifying for stitch, and a supplier should tell you that at the proofing stage rather than after the run.
Velocity Wear works online from a 50-piece minimum per order with sizes mixed freely, and the free Design Studio lets you see how a design sits on a collar, cap front or chest before you approve it. Embroidery typically runs around 10 to 15 working days from artwork approval, bulk discounts reach up to around 35% as quantities rise, and tracked UK delivery is usually 2 to 5 working days after dispatch.